The benefits of yoga wheel are numerous. It can be used for a variety of postures, including the Easy Pose, the Sitting Forward Fold, and the Fish Pose. It can also be used for strengthening core muscles. Yoga wheel is great for anyone looking for a simple tool to help with back pain. If you haven’t tried it, you can read about the benefits of yoga wheel here. The yoga wheel is a simple and inexpensive way to practice yoga for back pain.
Easy Pose
How to use yoga wheel for back pain involves balancing your body on the wheel. As with any other yoga pose, this one requires a certain level of balance and body awareness. Adding the wheel to the routine adds an extra layer of difficulty. Listed below are some examples of poses that can be performed on the wheel. Using a yoga wheel is an effective way to practice this pose. The following poses are also helpful for people with back pain.
Many people suffer from back pain because of physical strain and injuries. This can occur from lack of physical activity, overwork, or stress. Yoga is one way to ease back pain and other health problems, including a variety of injuries and strains. A yoga wheel is great for deep stretching of muscles in the lower back. Although it requires some experience to use, beginners can benefit from the wheel’s therapeutic benefits. Practicing yoga on a yoga wheel enables them to stretch further and perform more advanced poses.
To start, you need to find a comfortable position for sitting on the yoga wheel. Ideally, you will place the wheel under your middle spine. Keep your elbows close together and engage your core as you move back and forth. Once you have positioned your body in this way, you can sit on the wheel with your head resting on the wheel. The aim is to release the deep muscles in your back and open up your chest. You can also lean on the wheel while you’re sitting on the floor.
Once you’ve got a comfortable position, you can begin the downward dog posture. Begin by erecting one leg and then bending the other leg. Then, bend your knees so that they are hip-distance apart. Hold this pose for several minutes. While you’re doing this, focus on keeping your neck and back straight. You will be surprised by the benefits that yoga can have on your body.
Sitting forward fold
If you have back pain, you may want to avoid the traditional forward fold. This pose can exacerbate back problems due to its excessive pressure. To avoid back injury, you can practice a sitting forward fold instead. The most important tip in this posture is to keep your back straight. The forward bend is an effort to round your spine from an upright position. To achieve the correct position, deepen your hip creases and collapse your back. Once you have reached this point, stop the pose and make sure your thighs and ribs are firmly planted on the floor. If you have high blood pressure, it may not be advisable to try this exercise.
A forward fold helps you counter the downward pull of gravity. Most people lack flexibility in their hamstrings, which causes the lower back to round. This weakens the back and creates instability in the area around the lumbar spine. Practicing the forward fold can help you restore that flexibility. During the fold, bend your knees and bring the floor to you. Then, press your thighs to compress your abdomen. You can then straighten your legs if you are able to do so.
To prevent injuries caused by the Sitting Forward Fold, make sure you relax your hips first. The hamstrings pull the pelvis toward the back of the legs. When you extend beyond these muscles, you risk causing back pain or injury. To avoid back pain, you should try to gently encourage a deeper fold, not “yank” it forward. Stay in the position and exhale slowly to avoid any injuries.
Fish Pose
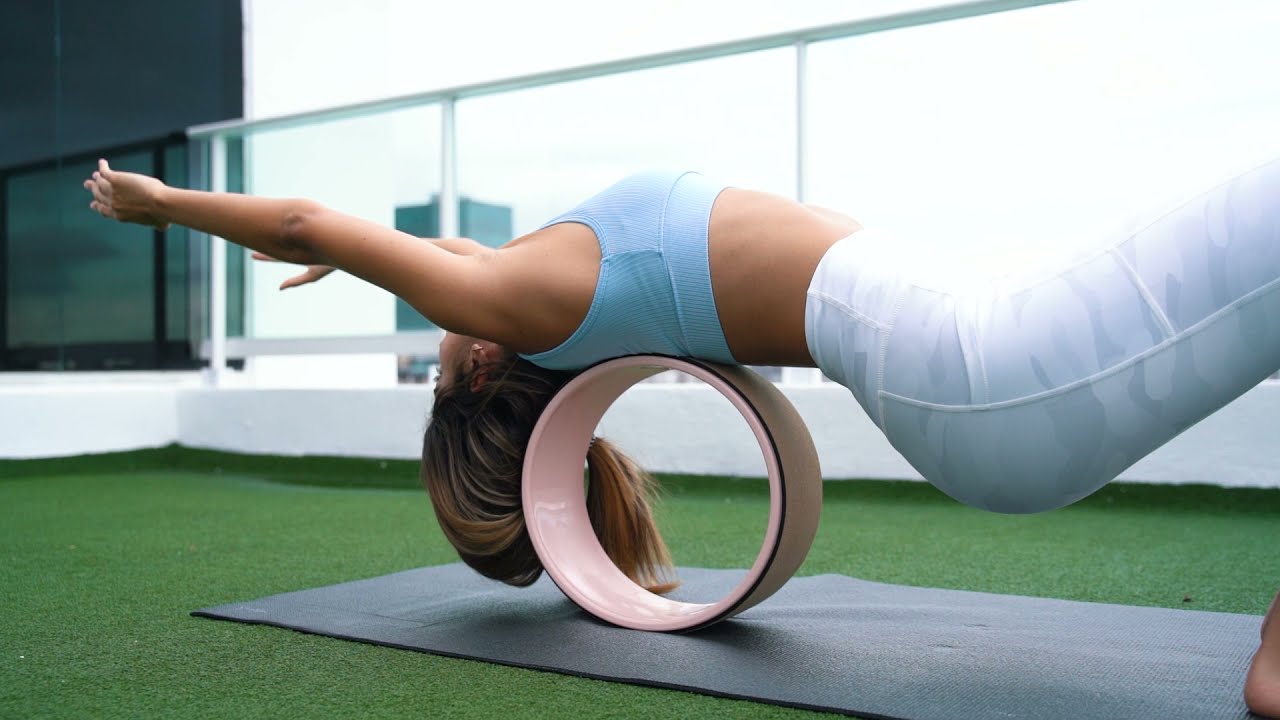
If you want to practice seated poses, the yoga wheel is a great tool to help you relieve back pain. When sitting on the yoga wheel, you will be seated with your hips lifted and your back pressed against the wheel. You can then reach your arms over your head, pointing behind you. While holding the yoga wheel, you will extend your spine over the wheel. Keep your shoulders relaxed and your chest open. This will help you remain in the seated position for at least 3 minutes.
Yoga is a great way to relieve back pain and increase range of motion. But you need to be aware of certain precautions. Using the yoga wheel incorrectly can cause further pain or aggravate existing injuries. Try to keep your body hydrated and drink plenty of water to flush toxins. It may be uncomfortable at first, so you may want to use a travel pillow to cushion yourself. As with any exercise equipment, the yoga wheel is best used under the supervision of a trained instructor.
The yoga wheel works by massaging your back with a gentle massage. Once you’ve got it right, you’re ready to try a few of the many different poses it offers. The first yoga wheel pose you’ll want to try is the wheel-assisted fish pose. In this pose, you’ll need to lean back and lift your hips. Then, roll your spine onto the yoga wheel and reach for the end of your stretch. Once you’ve reached the end of this posture, you’ll feel a tremendous stretch throughout your back and quads. Be sure to extend your arms wide to the sides to give yourself even more support.
While it’s important to be careful not to overstretch while performing this pose, this one is particularly challenging. While you’re balancing on the yoga wheel, you’ll have to be very careful not to overstretch your wrists. You can also adjust your stance to prevent swaying your back and putting additional strain on your lower back. This exercise helps you develop confidence and strength in the working muscles of your back.
Sirsasana
If you have back pain, a yoga wheel can help you get the benefits of this challenging pose. You need to be seated and start with your forearms underneath your shoulders. Once you have a good grip on the wheel, you can begin the pose. Then, roll backwards and forwards while keeping your shoulders, hips, and head still. This exercise will help you to align your spine and feel great!
To begin the posture, place the wheel under your mid-back and stretch your back. Your elbows should be close together, so you won’t drift away. Your hips should rest comfortably on the wheel as well. Once you’ve leaned back, lean into the wheel and relax your neck and head. Your focus is on your back and releasing those deep muscles in your lower back. Leaning on the wheel also helps you stay in the pose longer, so you’ll feel a lot better afterward.
Once you’ve found a comfortable position, place the yoga wheel between your feet. Lean back to reach the wheel, grasp both sides of it with your hands, and roll forward. Stop when your head touches the floor. Your body should feel a stretch as you go, and only continue if it’s comfortable. If you have a bad back, don’t worry – there are many other poses that you can do to help relieve your back pain.
Once you’ve established that you’re ready to try the yoga wheel for back pain, you’ll be amazed at the benefits. The stretch it provides helps your back muscles stretch deeply and gives your body a deep and relaxed feeling. The yoga wheel can also help release toxins and increase range of motion. The wheel can also aid with the pain caused by overworking the body. It can be uncomfortable at first, but soon it’ll no longer hurt to lie on it.
Anjaneyasana with yoga wheel
This variation of Anjaneyasana involves the use of a yoga wheel. The yoga wheel adds a bit of pressure to the upper body in this asana. To perform the pose, place the brim of the wheel on the floor. Then, bend your elbows and stand up tall. This variation of the pose emphasizes the shoulders, arms and navel. Moreover, it also stretches the muscles in the back and leg.
Start in the inner leg stretch position by kneeling on a blanket and holding onto a wall or a sturdy object. Lift your right leg and place it in the center of the wheel. Straighten your other leg. Focus your attention on one spot and hold for 15 to 30 seconds. You can do this exercise on either side. If you experience back pain, it’s best to consult with a doctor before starting this exercise.
Once you’ve mastered this asana, move on to more advanced postures. One great way to get started with yoga is with cat-cow stretches. For example, you might want to hold a cat-cow position on the yoga wheel for a few minutes before attempting to hold it for longer. As you get stronger, the cat-cow pose can help relieve lower back pain by strengthening the core muscles.
You may also want to try the upside-down pike press on the yoga wheel. This pose is relatively easy to perform and can be done by anyone. The yoga wheel is a convenient support during asana practice and is a great way to relieve tension in the shoulders, arms, and upper back. It can also increase circulation and improve breathing. This asana can also be done on the floor.